Electric vehicles (EVs) are becoming more and more popular as people shift towards sustainable and environmentally friendly transportation options. With the increasing demand for EVs, the need for reliable and convenient charging options is also growing. Installing an EV charger at home is a great way to ensure you have access to a convenient charging option, and it’s not as difficult as you might think. In this blog post, we will walk you through the process of installing an EV charger.
Step 1: Choose Your Charging Station
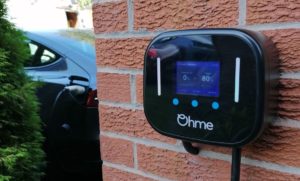
The first step in installing an EV charger is to choose the charging station that best suits your needs. There are several factors to consider when choosing a charging station, including the type of connector your EV requires, the power output you need, and the features you want.
There are several types of charging stations available, including level 1, level 2, and DC fast chargers. Level 1 chargers use a standard 120V outlet and provide a charging rate of about 4-5 miles of range per hour. Level 2 chargers require a 240V outlet and provide a charging rate of about 25-30 miles of range per hour. DC fast chargers provide the fastest charging rates, but they are typically only found in public charging stations.
Step 2: Prepare Your Electrical System
Before you can install your EV charger, you need to ensure that your electrical system can handle the load. You may need to upgrade your electrical panel or install a dedicated circuit for the charger. It’s best to consult a licensed electrician to determine the best course of action.
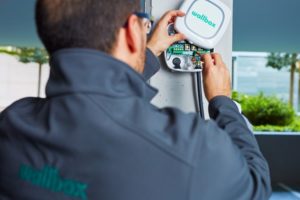
Step 3: Install the Charging Station
Once your electrical system is ready, it’s time to install the charging station. Most EV chargers come with detailed installation instructions, but it’s important to follow all safety protocols and consult a licensed electrician if you have any questions or concerns.
First, you need to mount the charging station on a wall or post in a location that is convenient for you to access. Next, you need to connect the charging station to the power source and ensure that all wiring is properly installed and secured. Finally, you need to test the charging station to ensure that it is working properly.
Step 4: Set Up Your Charging Schedule
Most EV chargers come with scheduling features that allow you to set specific times for charging your vehicle. This can help you take advantage of off-peak electricity rates and avoid overloading your electrical system during peak hours. Be sure to take advantage of these scheduling features to maximize the efficiency of your EV charging.
Step 5: Start Charging!
Once your EV charger is installed and set up, you’re ready to start charging your vehicle! Simply plug in your vehicle and let the charger do its job.
In conclusion, installing an EV charger at home is a relatively simple process that can provide a convenient and efficient charging option for your electric vehicle. Be sure to choose the right charging station, prepare your electrical system, follow all safety protocols during installation, and take advantage of scheduling features to maximize the efficiency of your charging. With a little effort, you’ll be ready to start enjoying the benefits of electric vehicle ownership!